


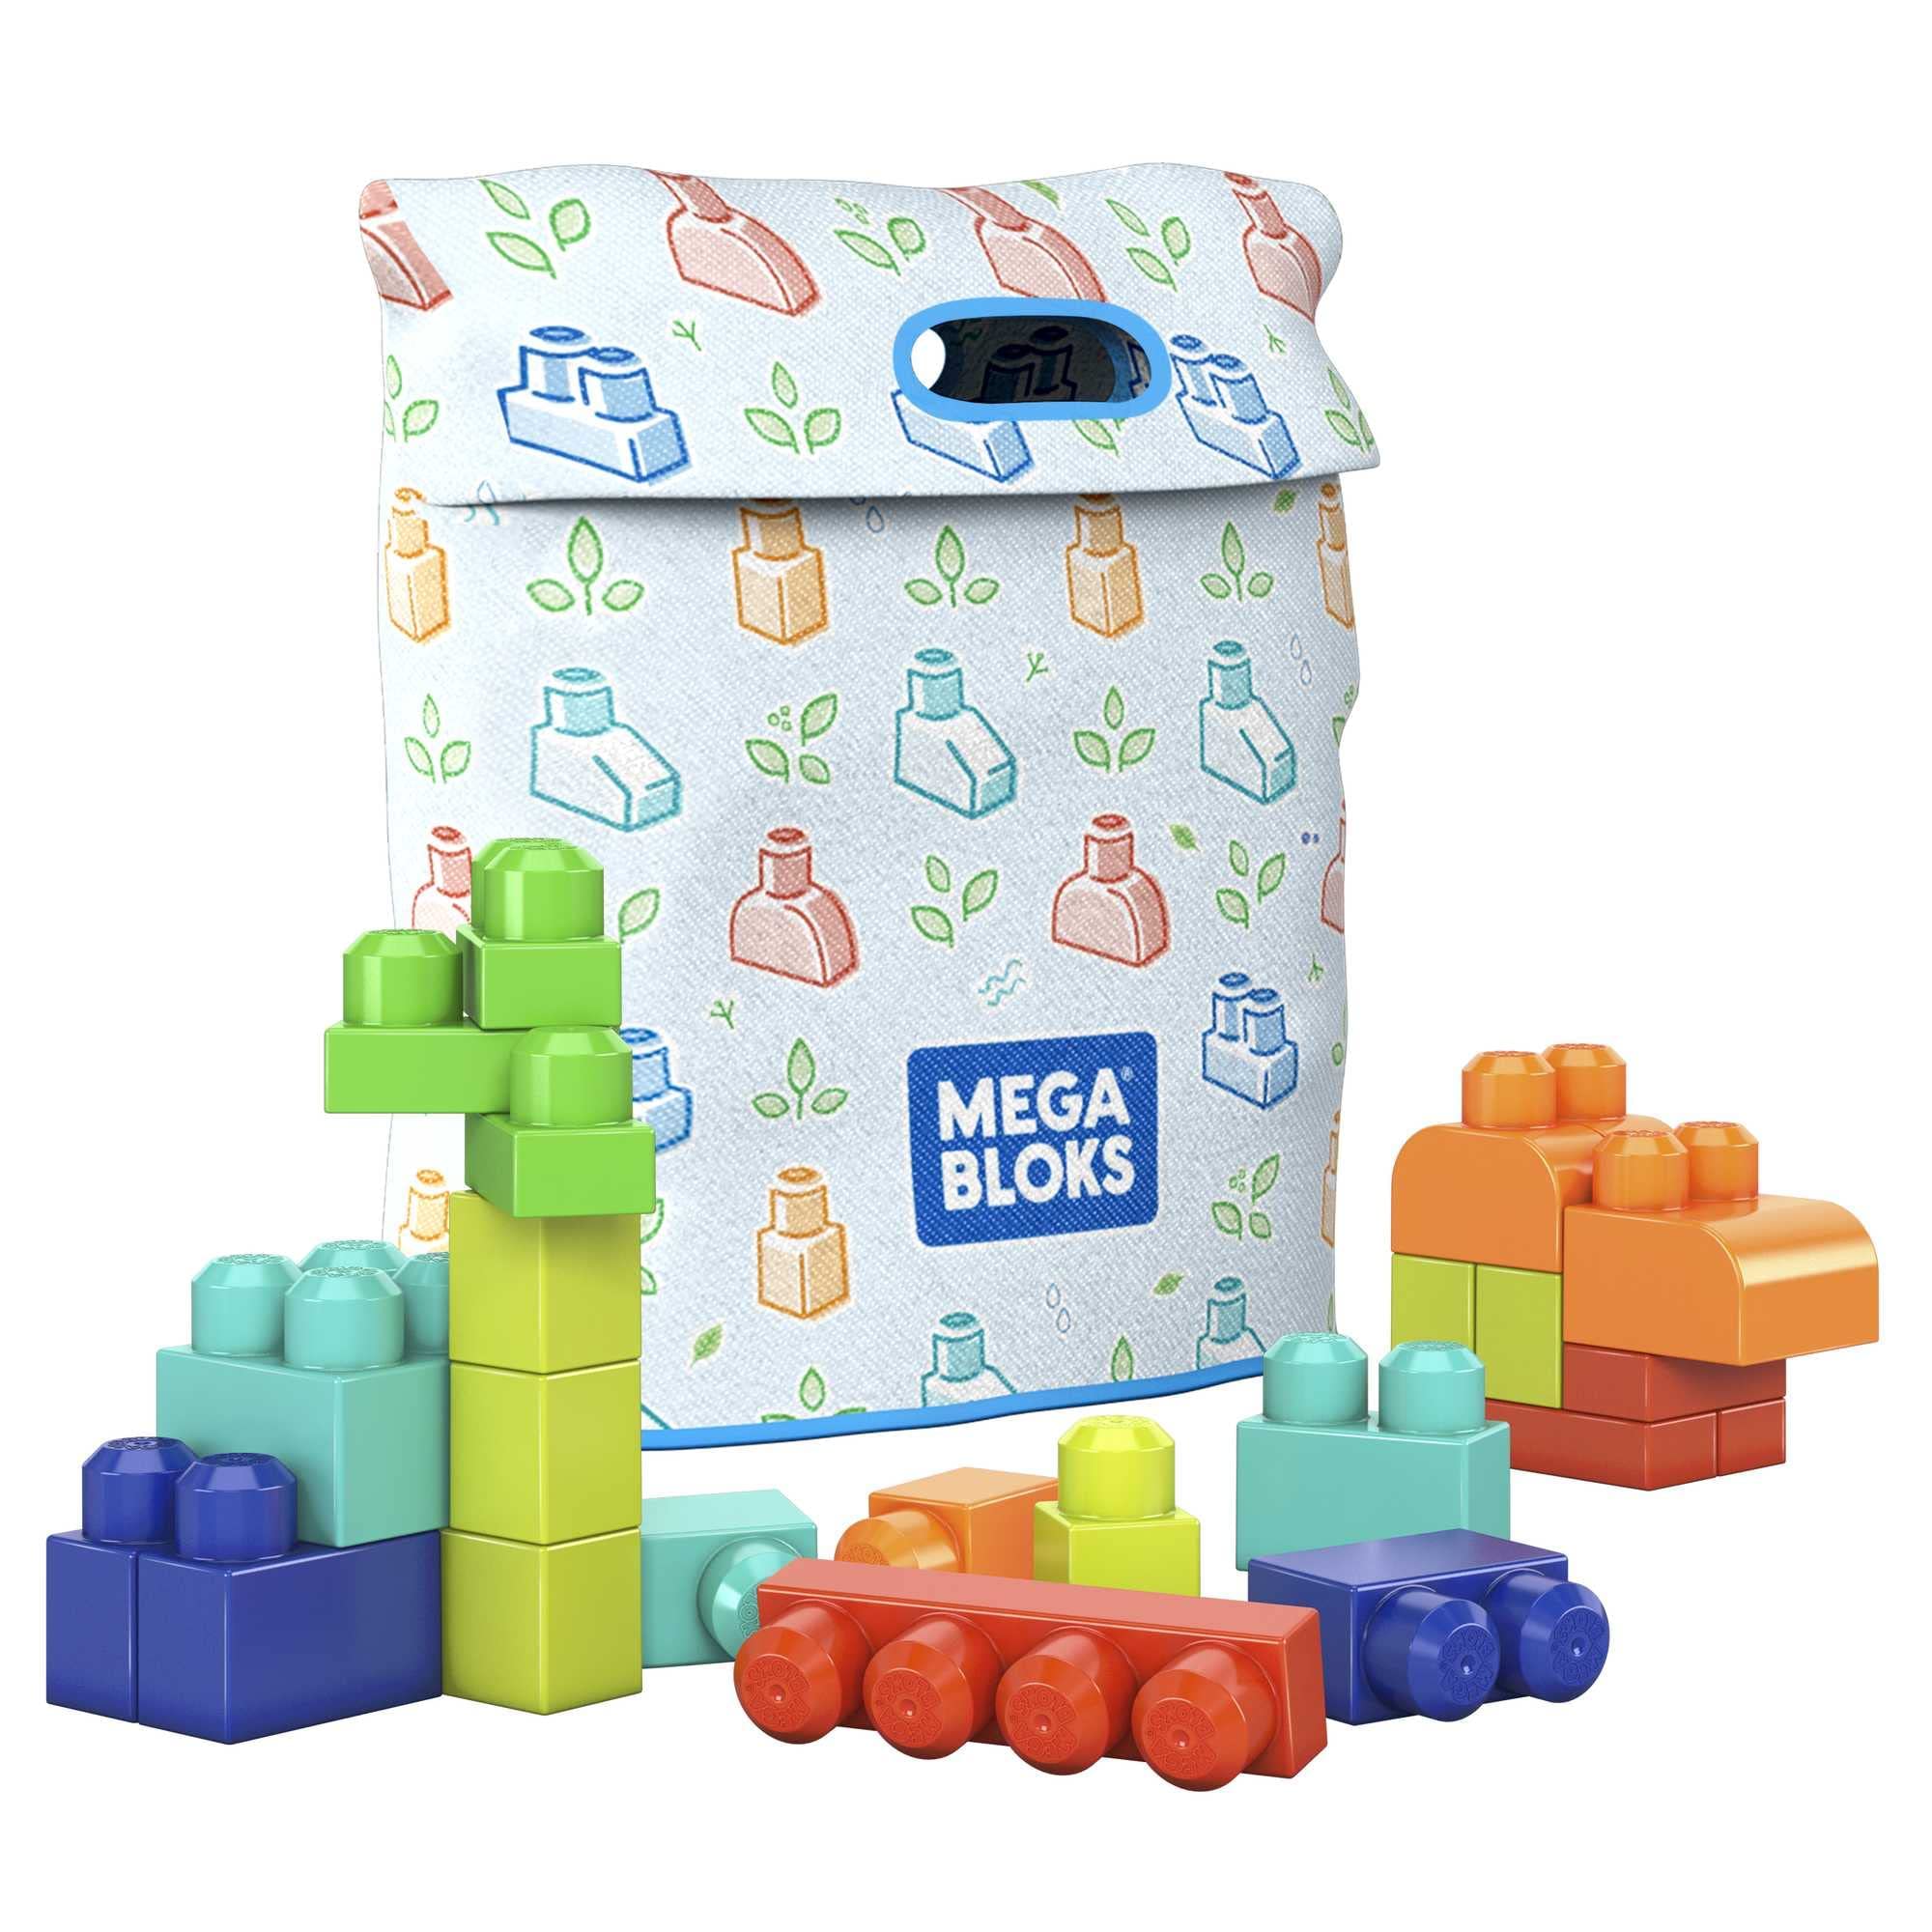
What are Mega Bloks?
Fisher Price endorses the product. Mega Bloks are fun learning blocks designed to be safe for toddlers and young children.
Why use or make additions?
Alone mega bloks are a great learning tool for kids, however, with the addition of numbers and letters; they can further learn and develop. Kids can have customized mega bloks to their interests which can further promote creativity.
How to make additions.
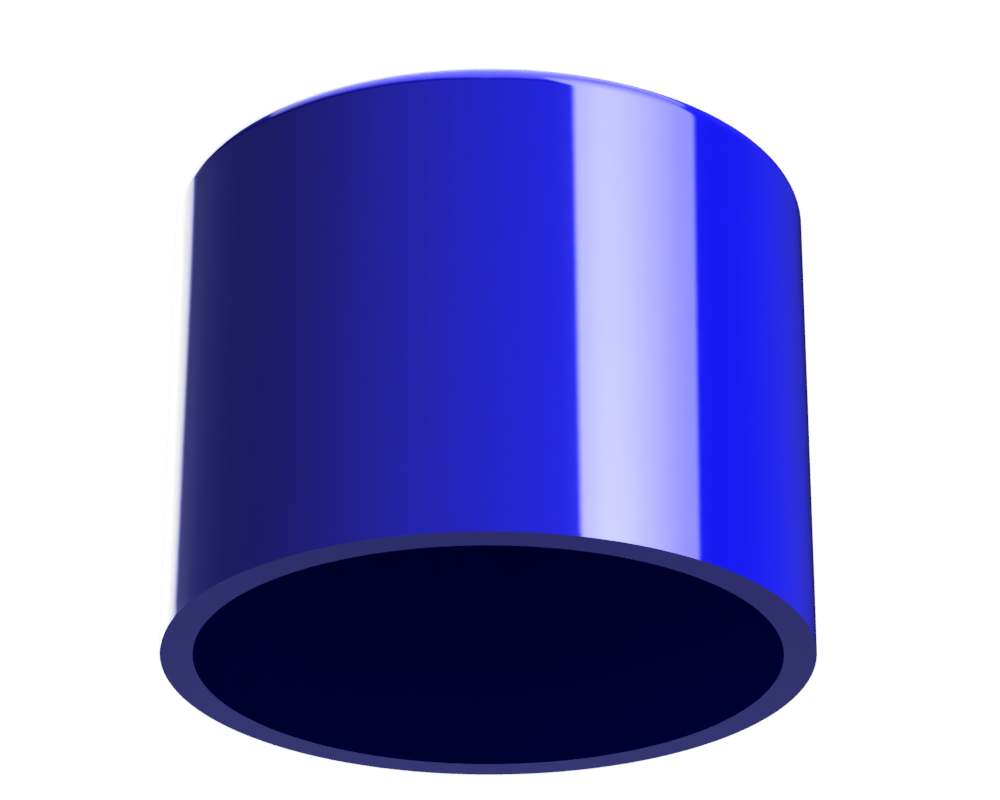
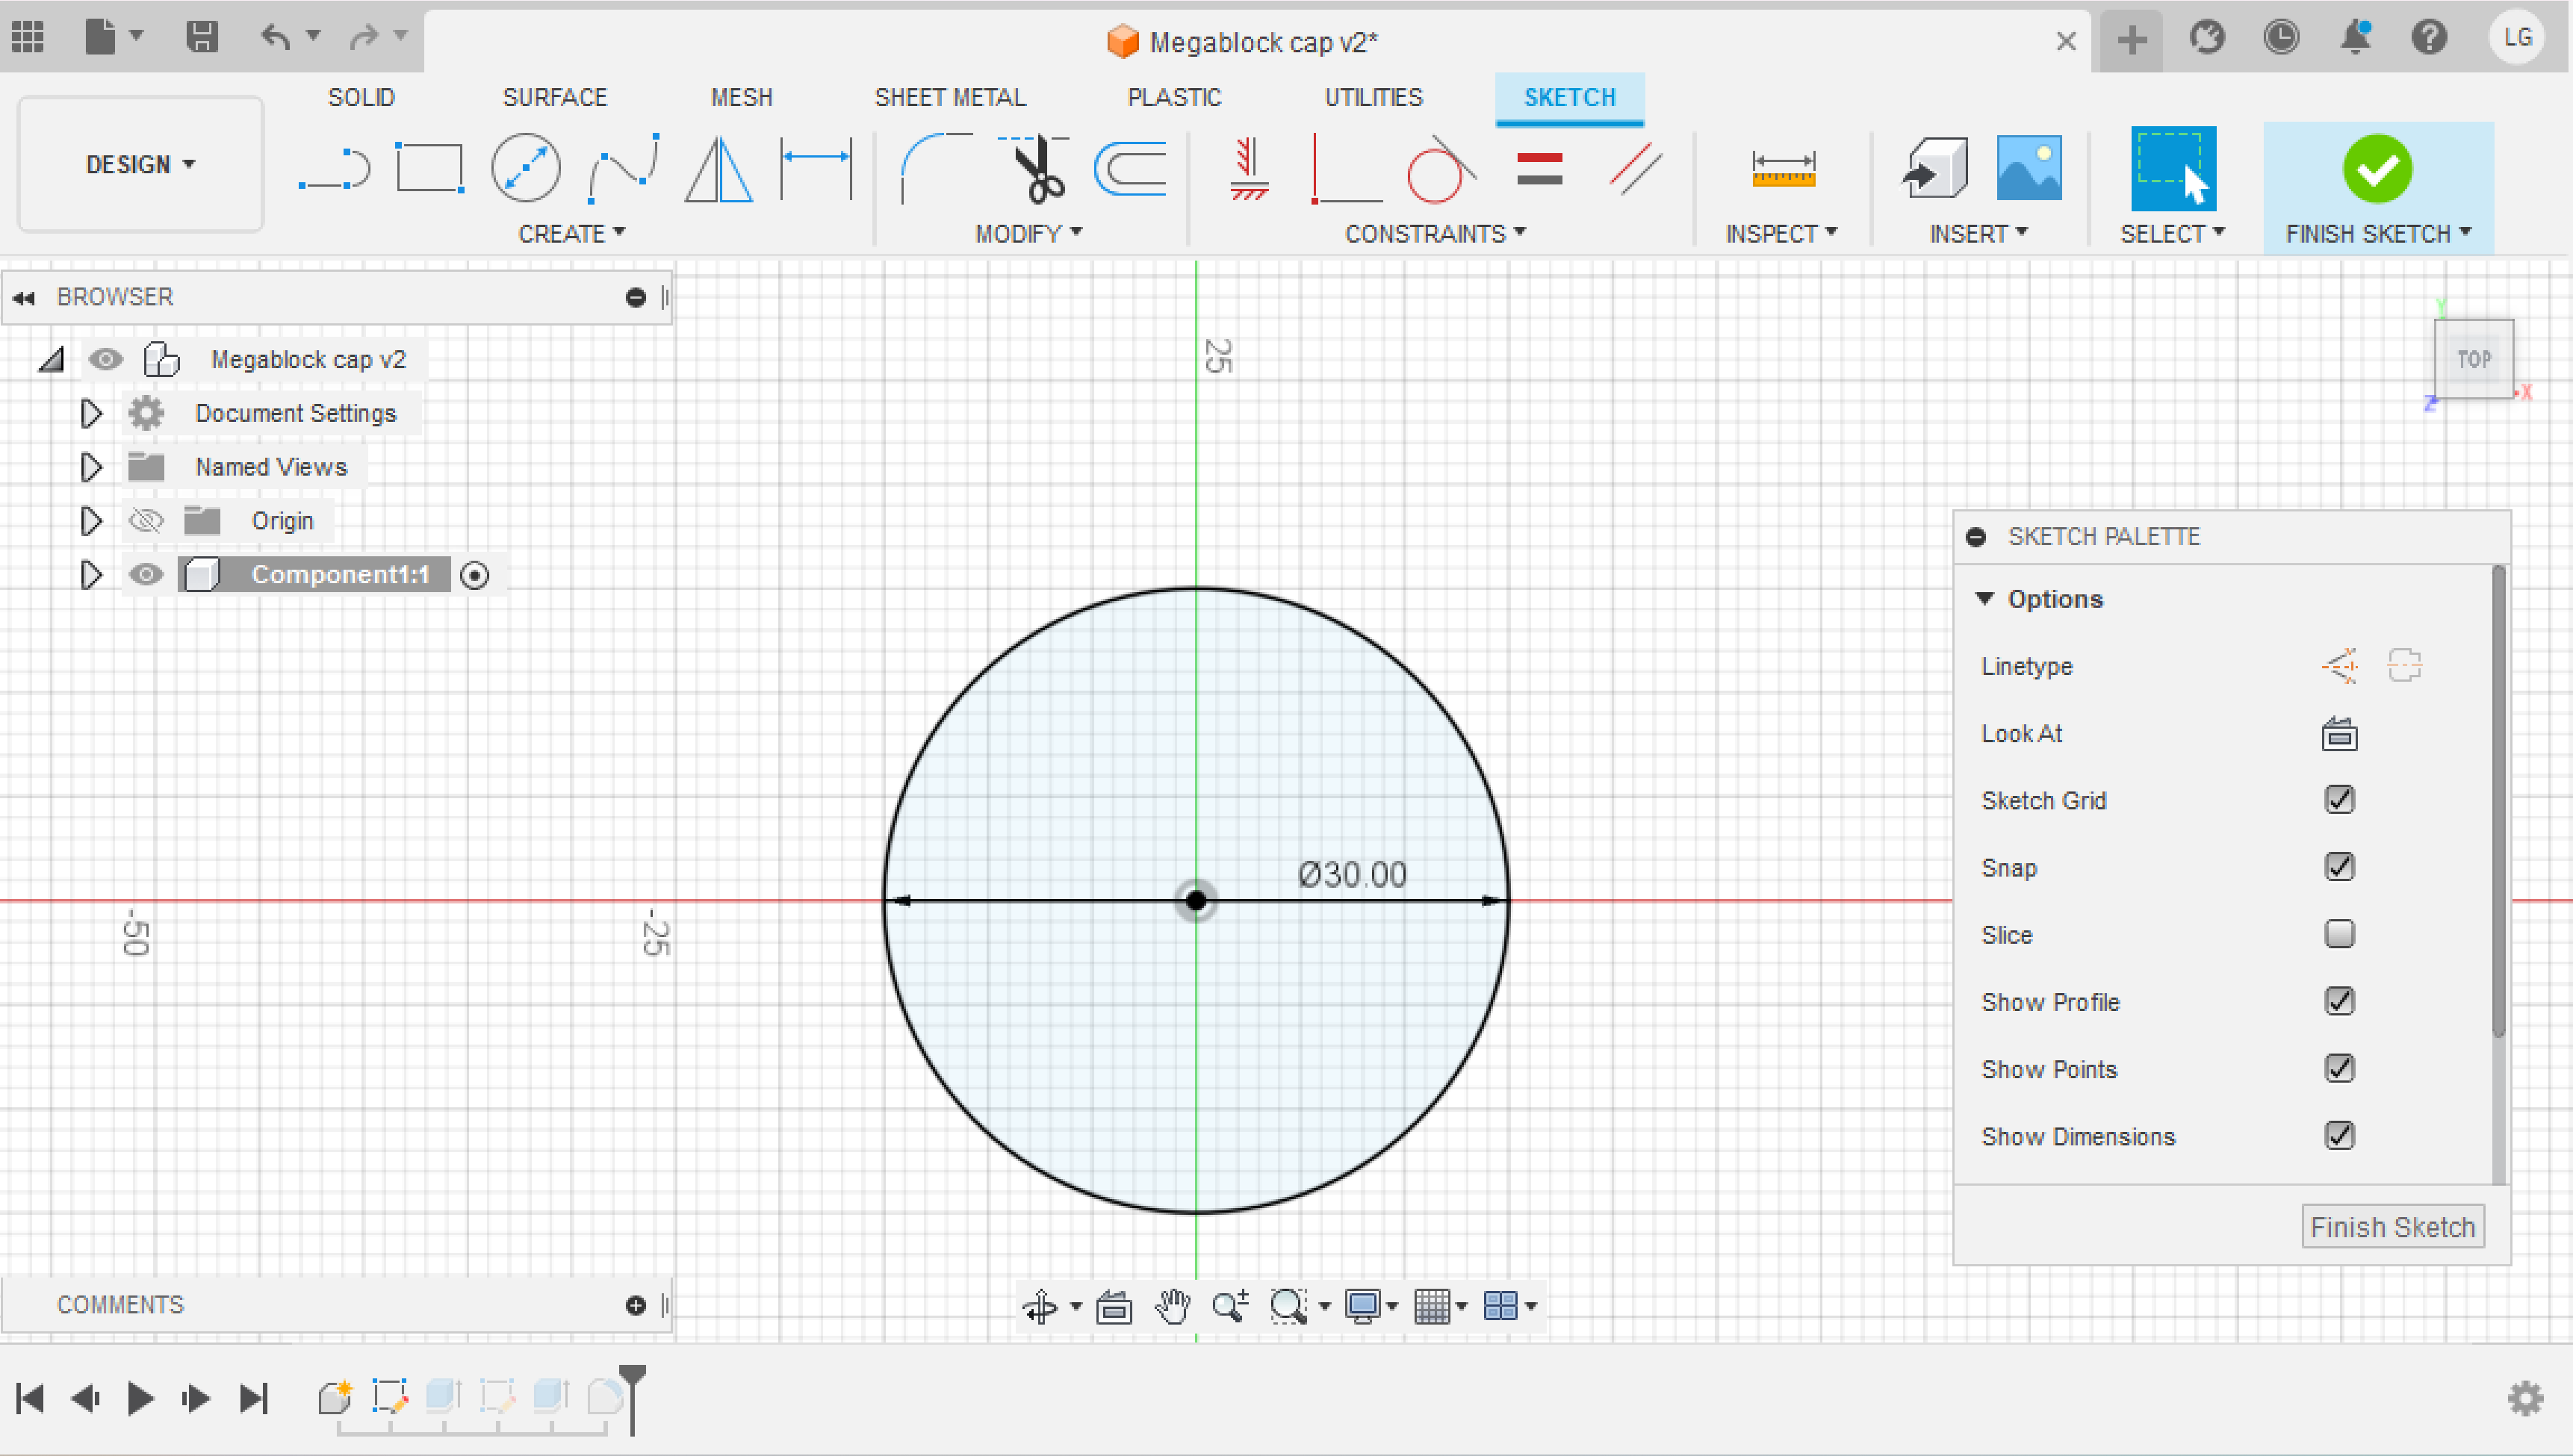
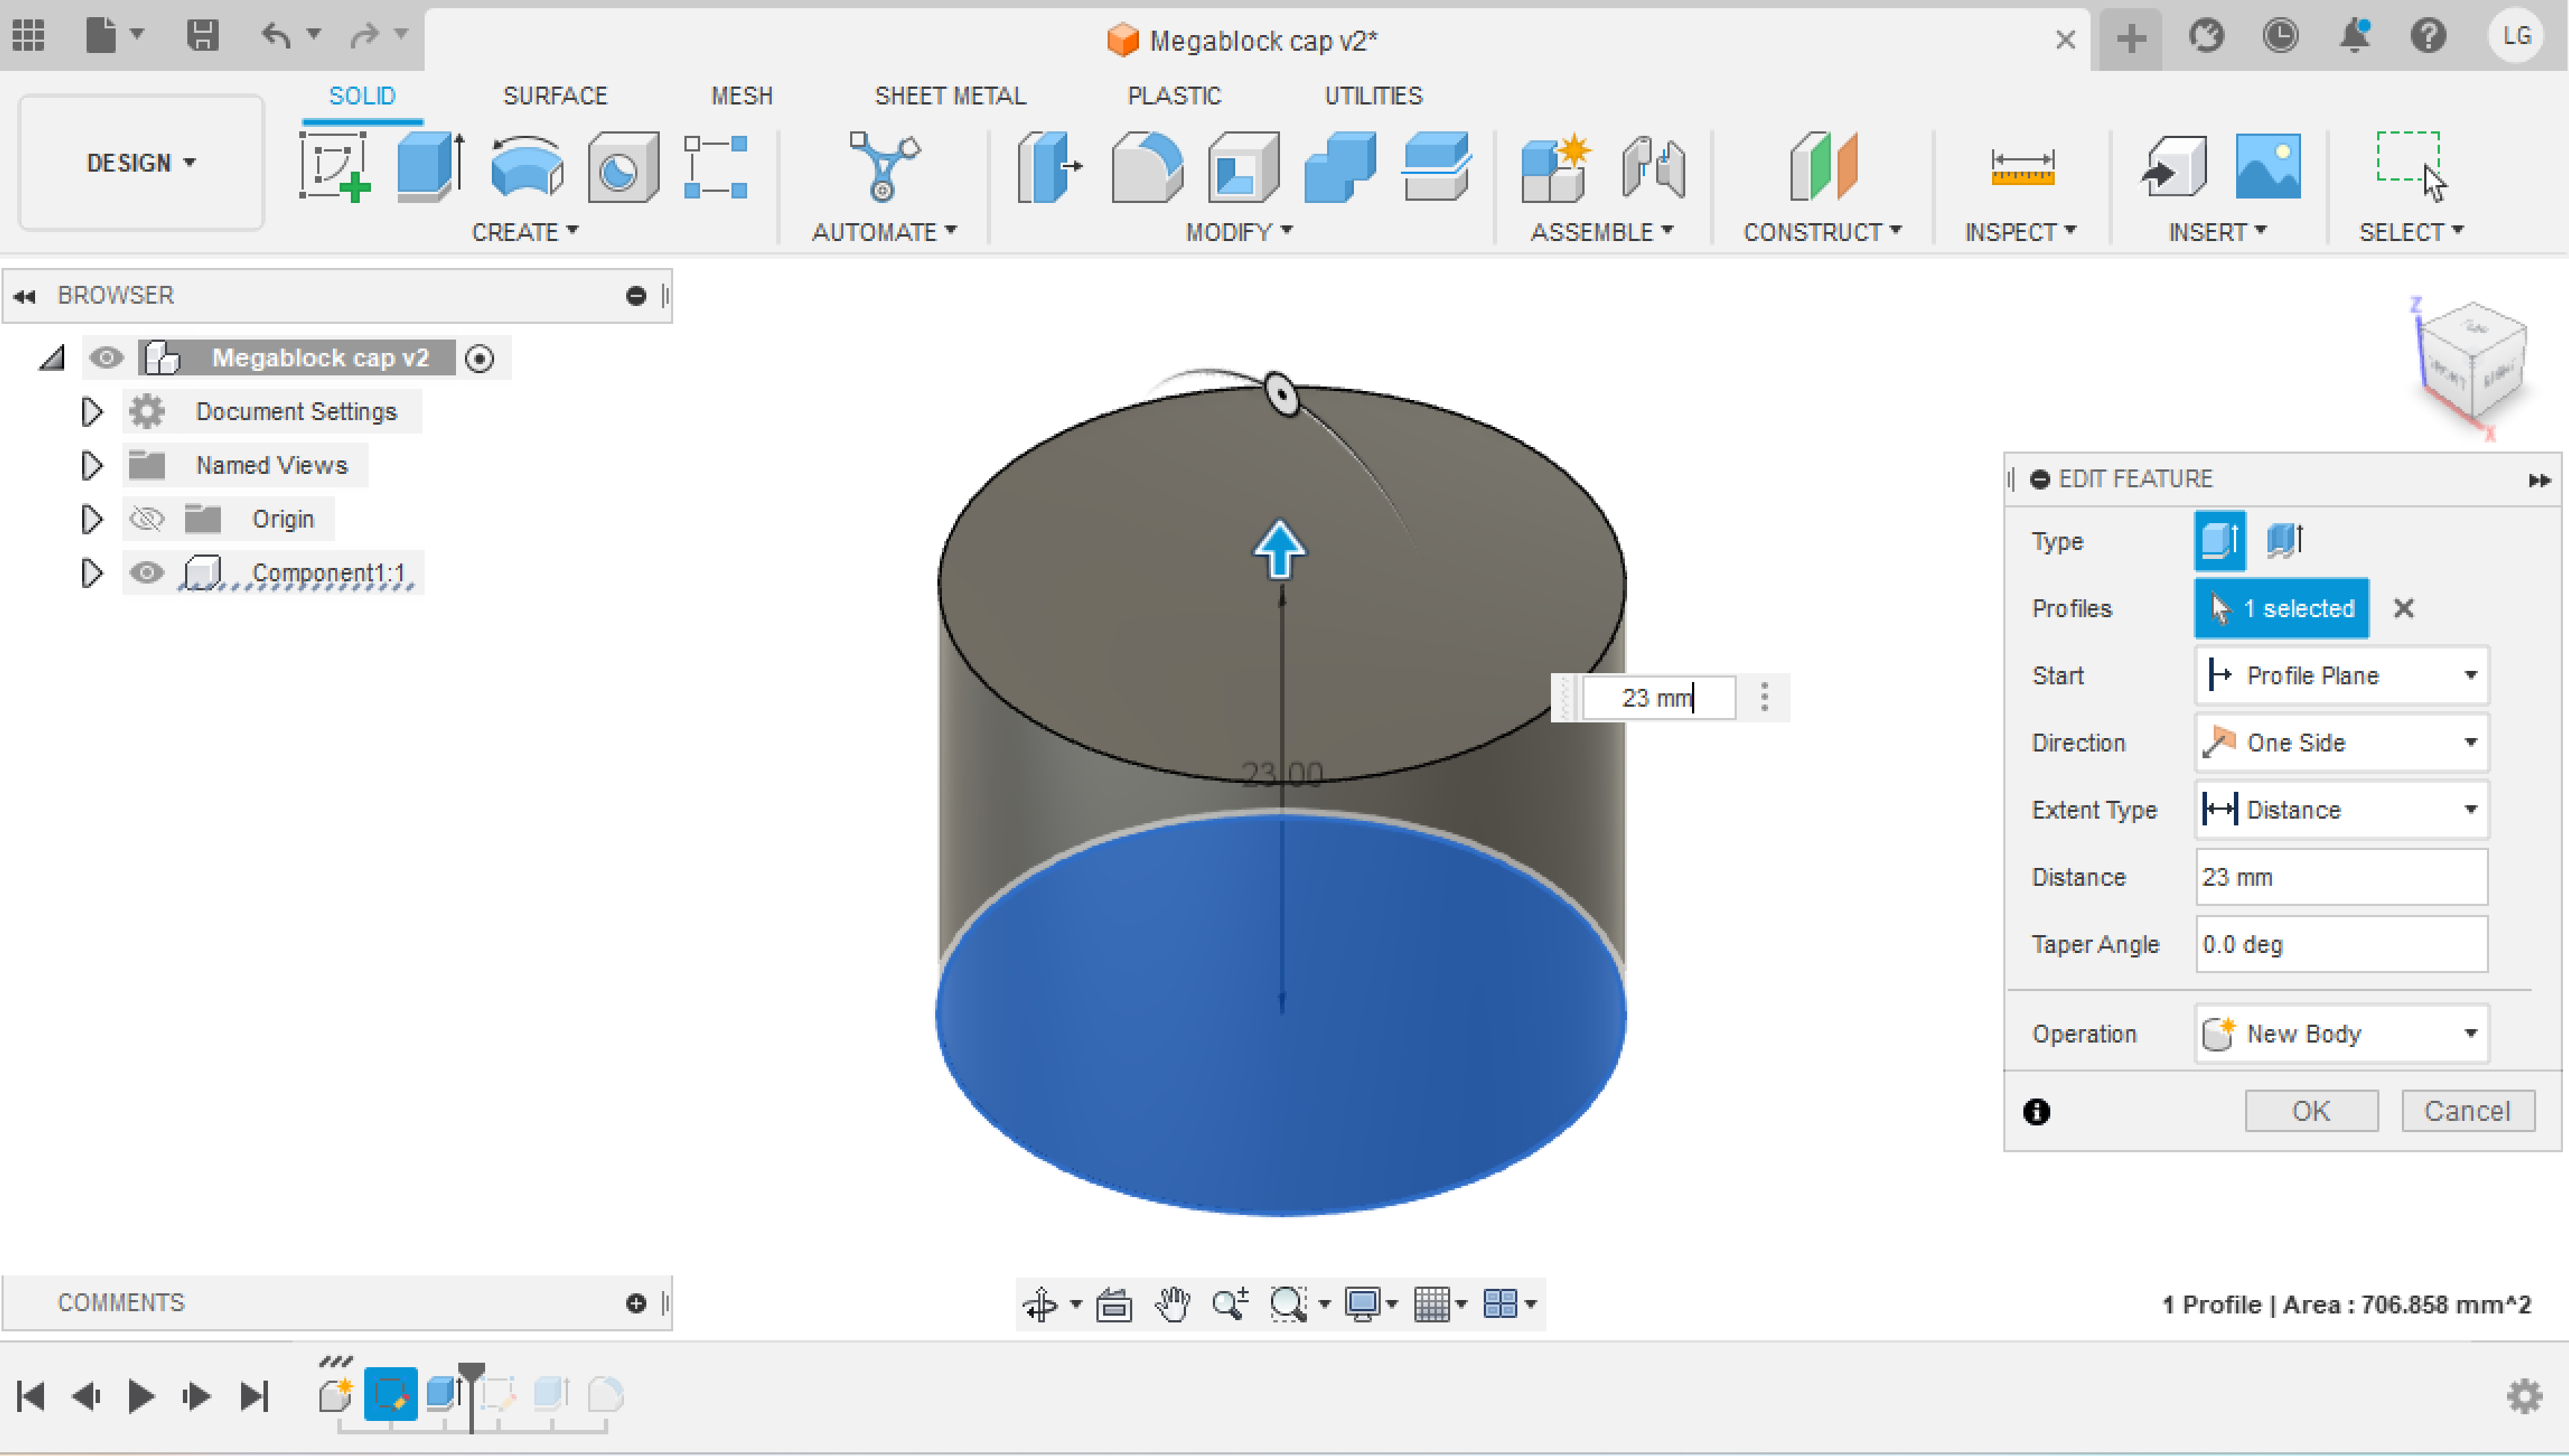
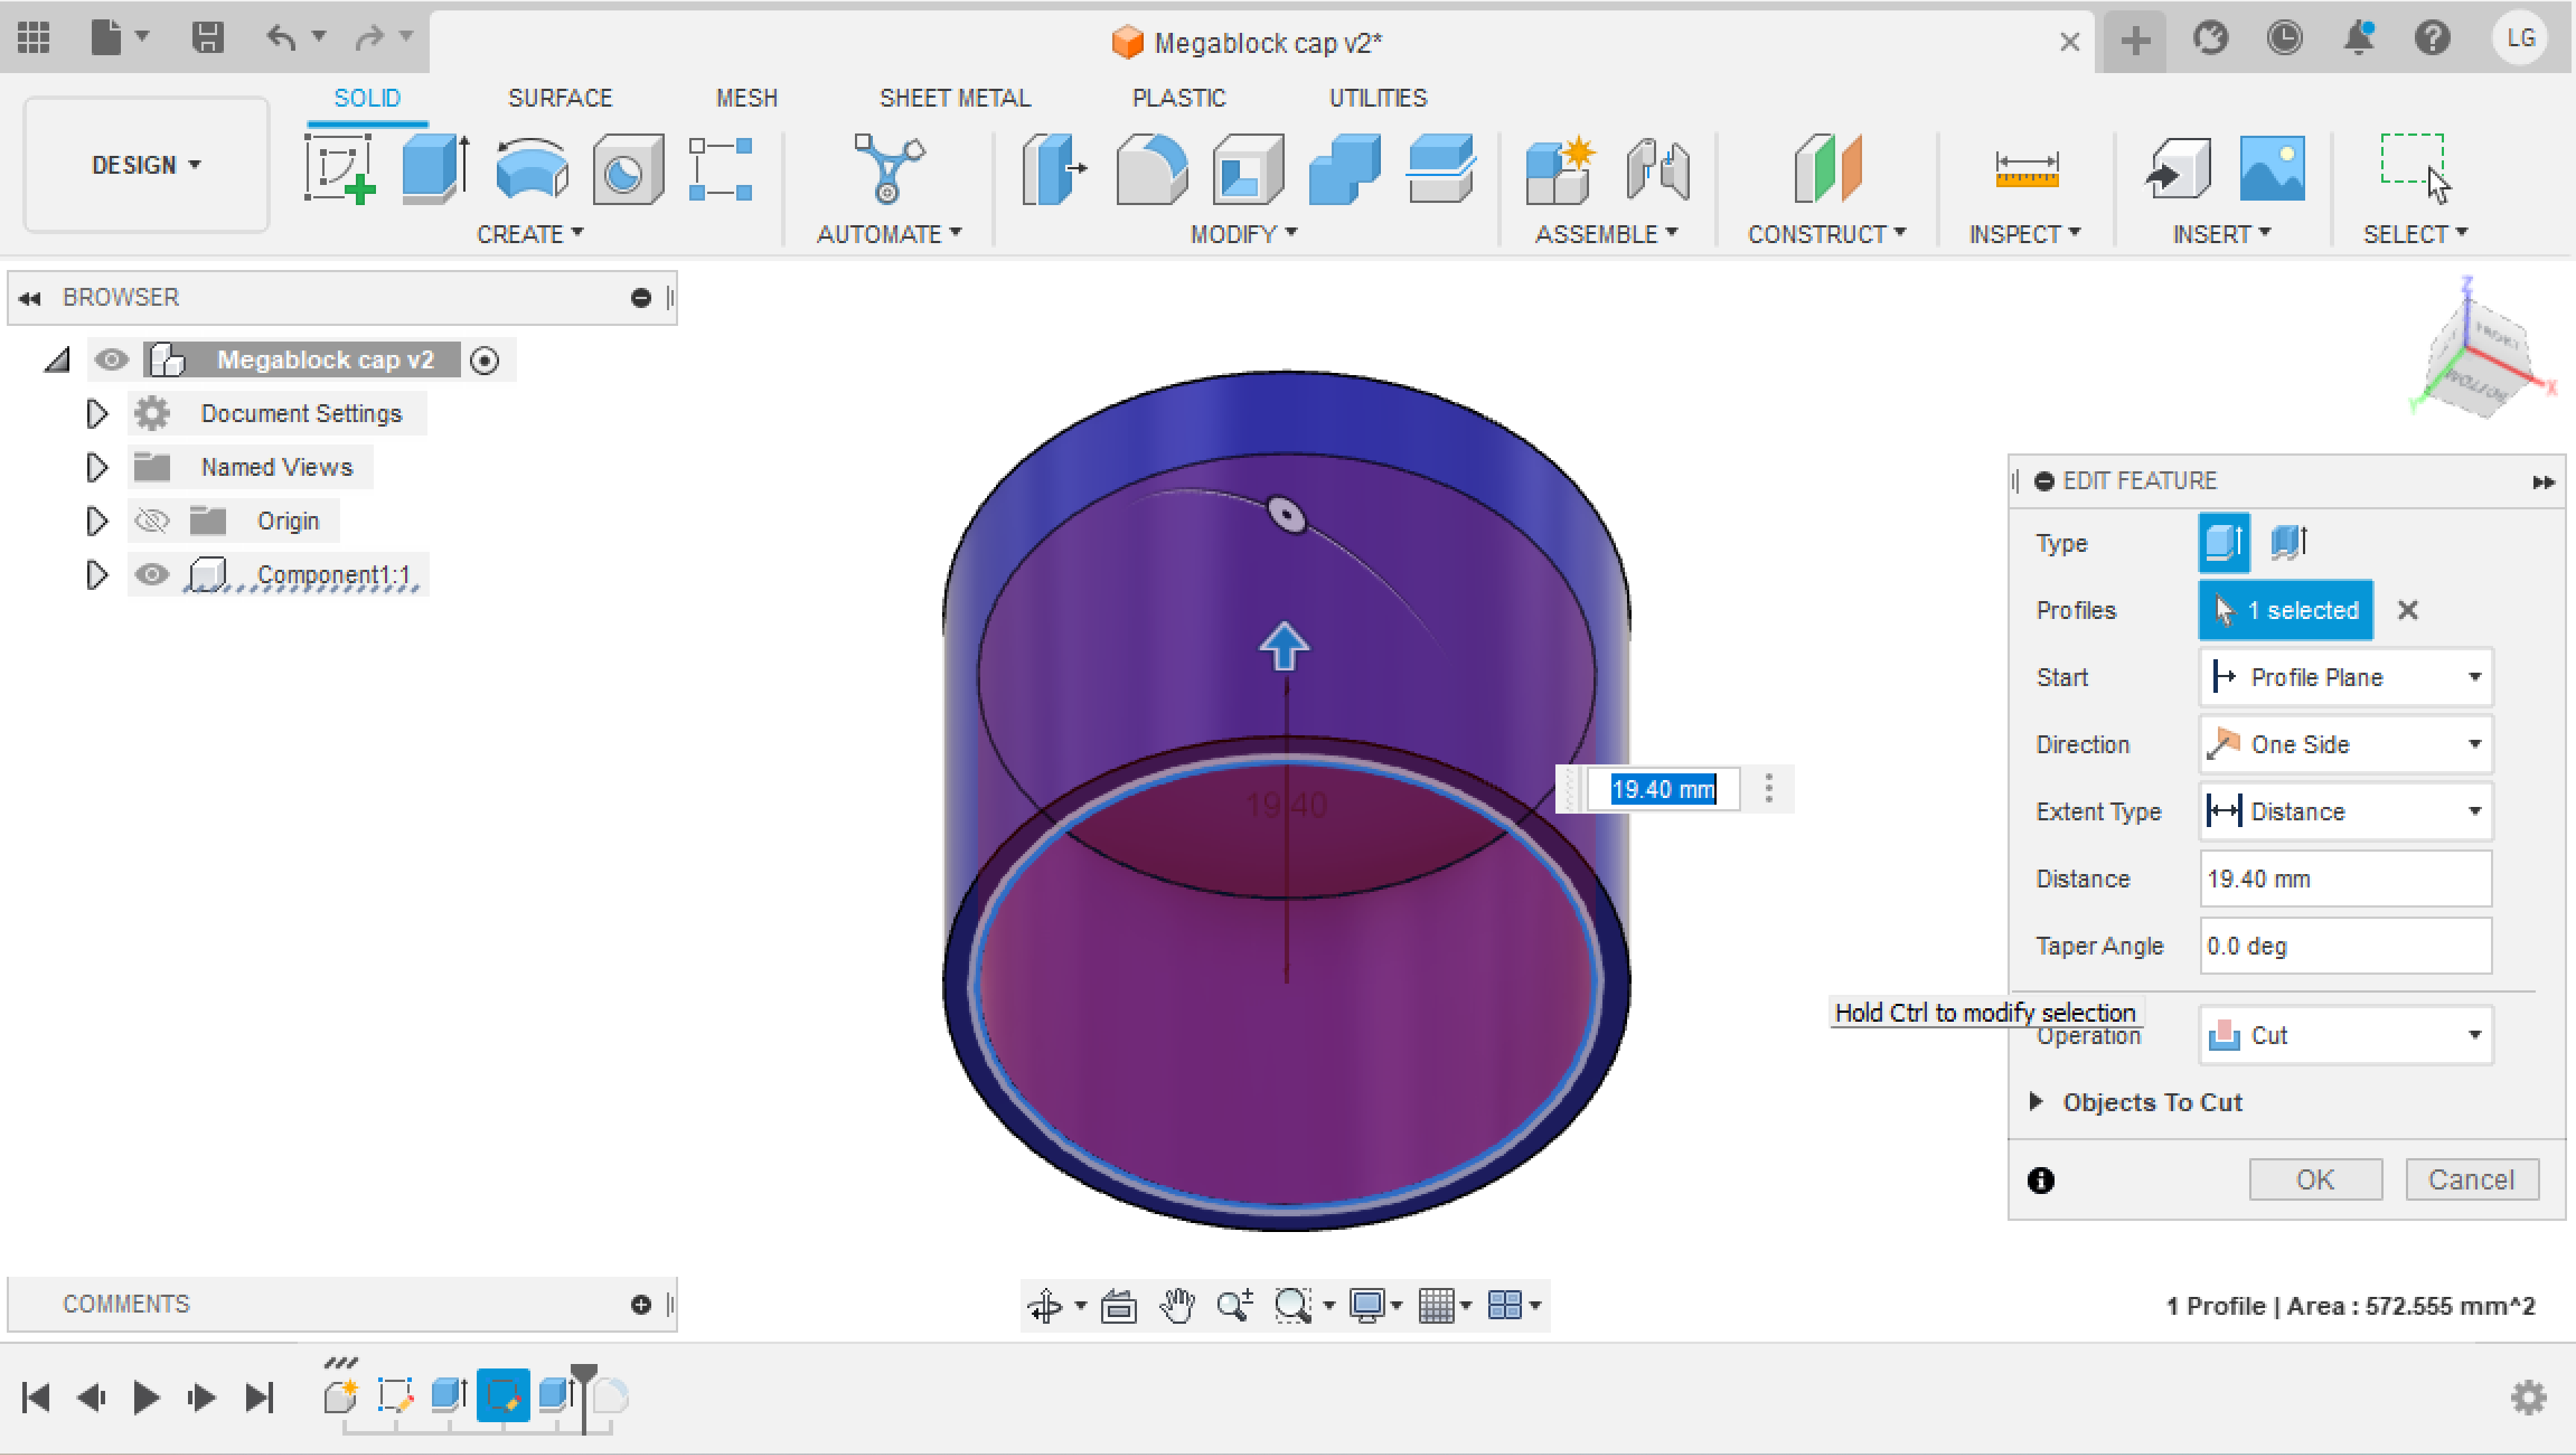
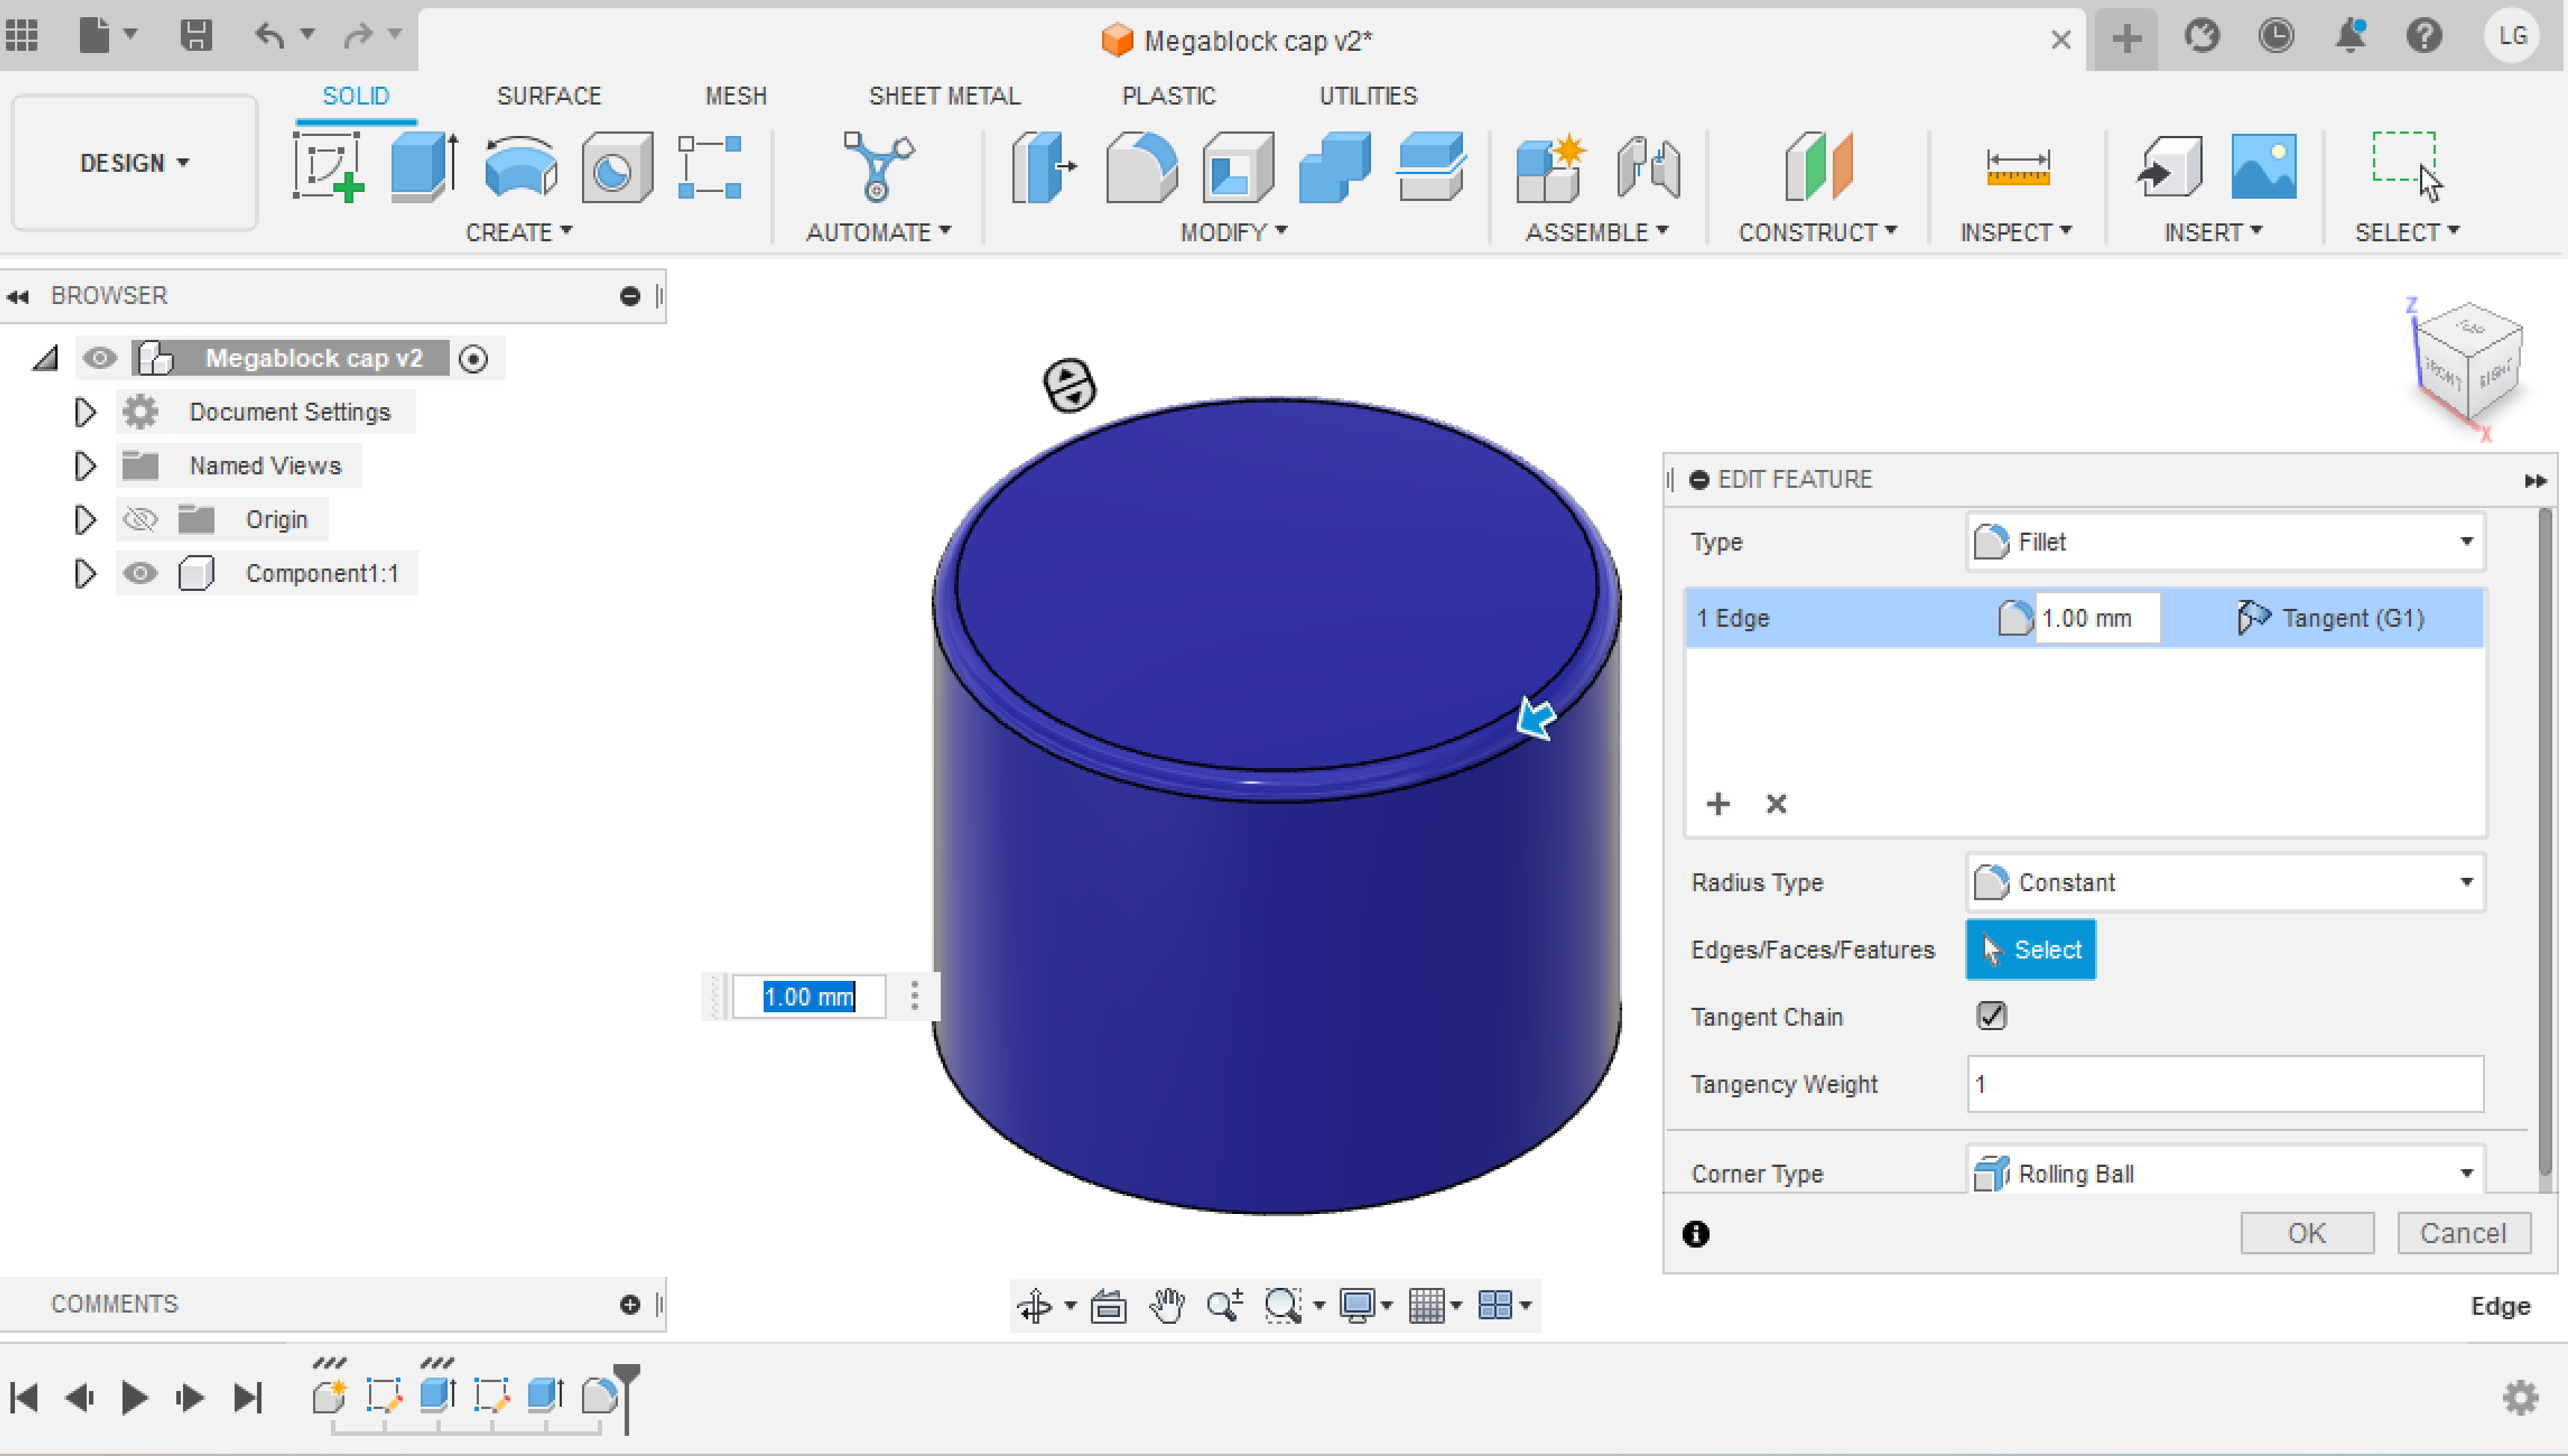
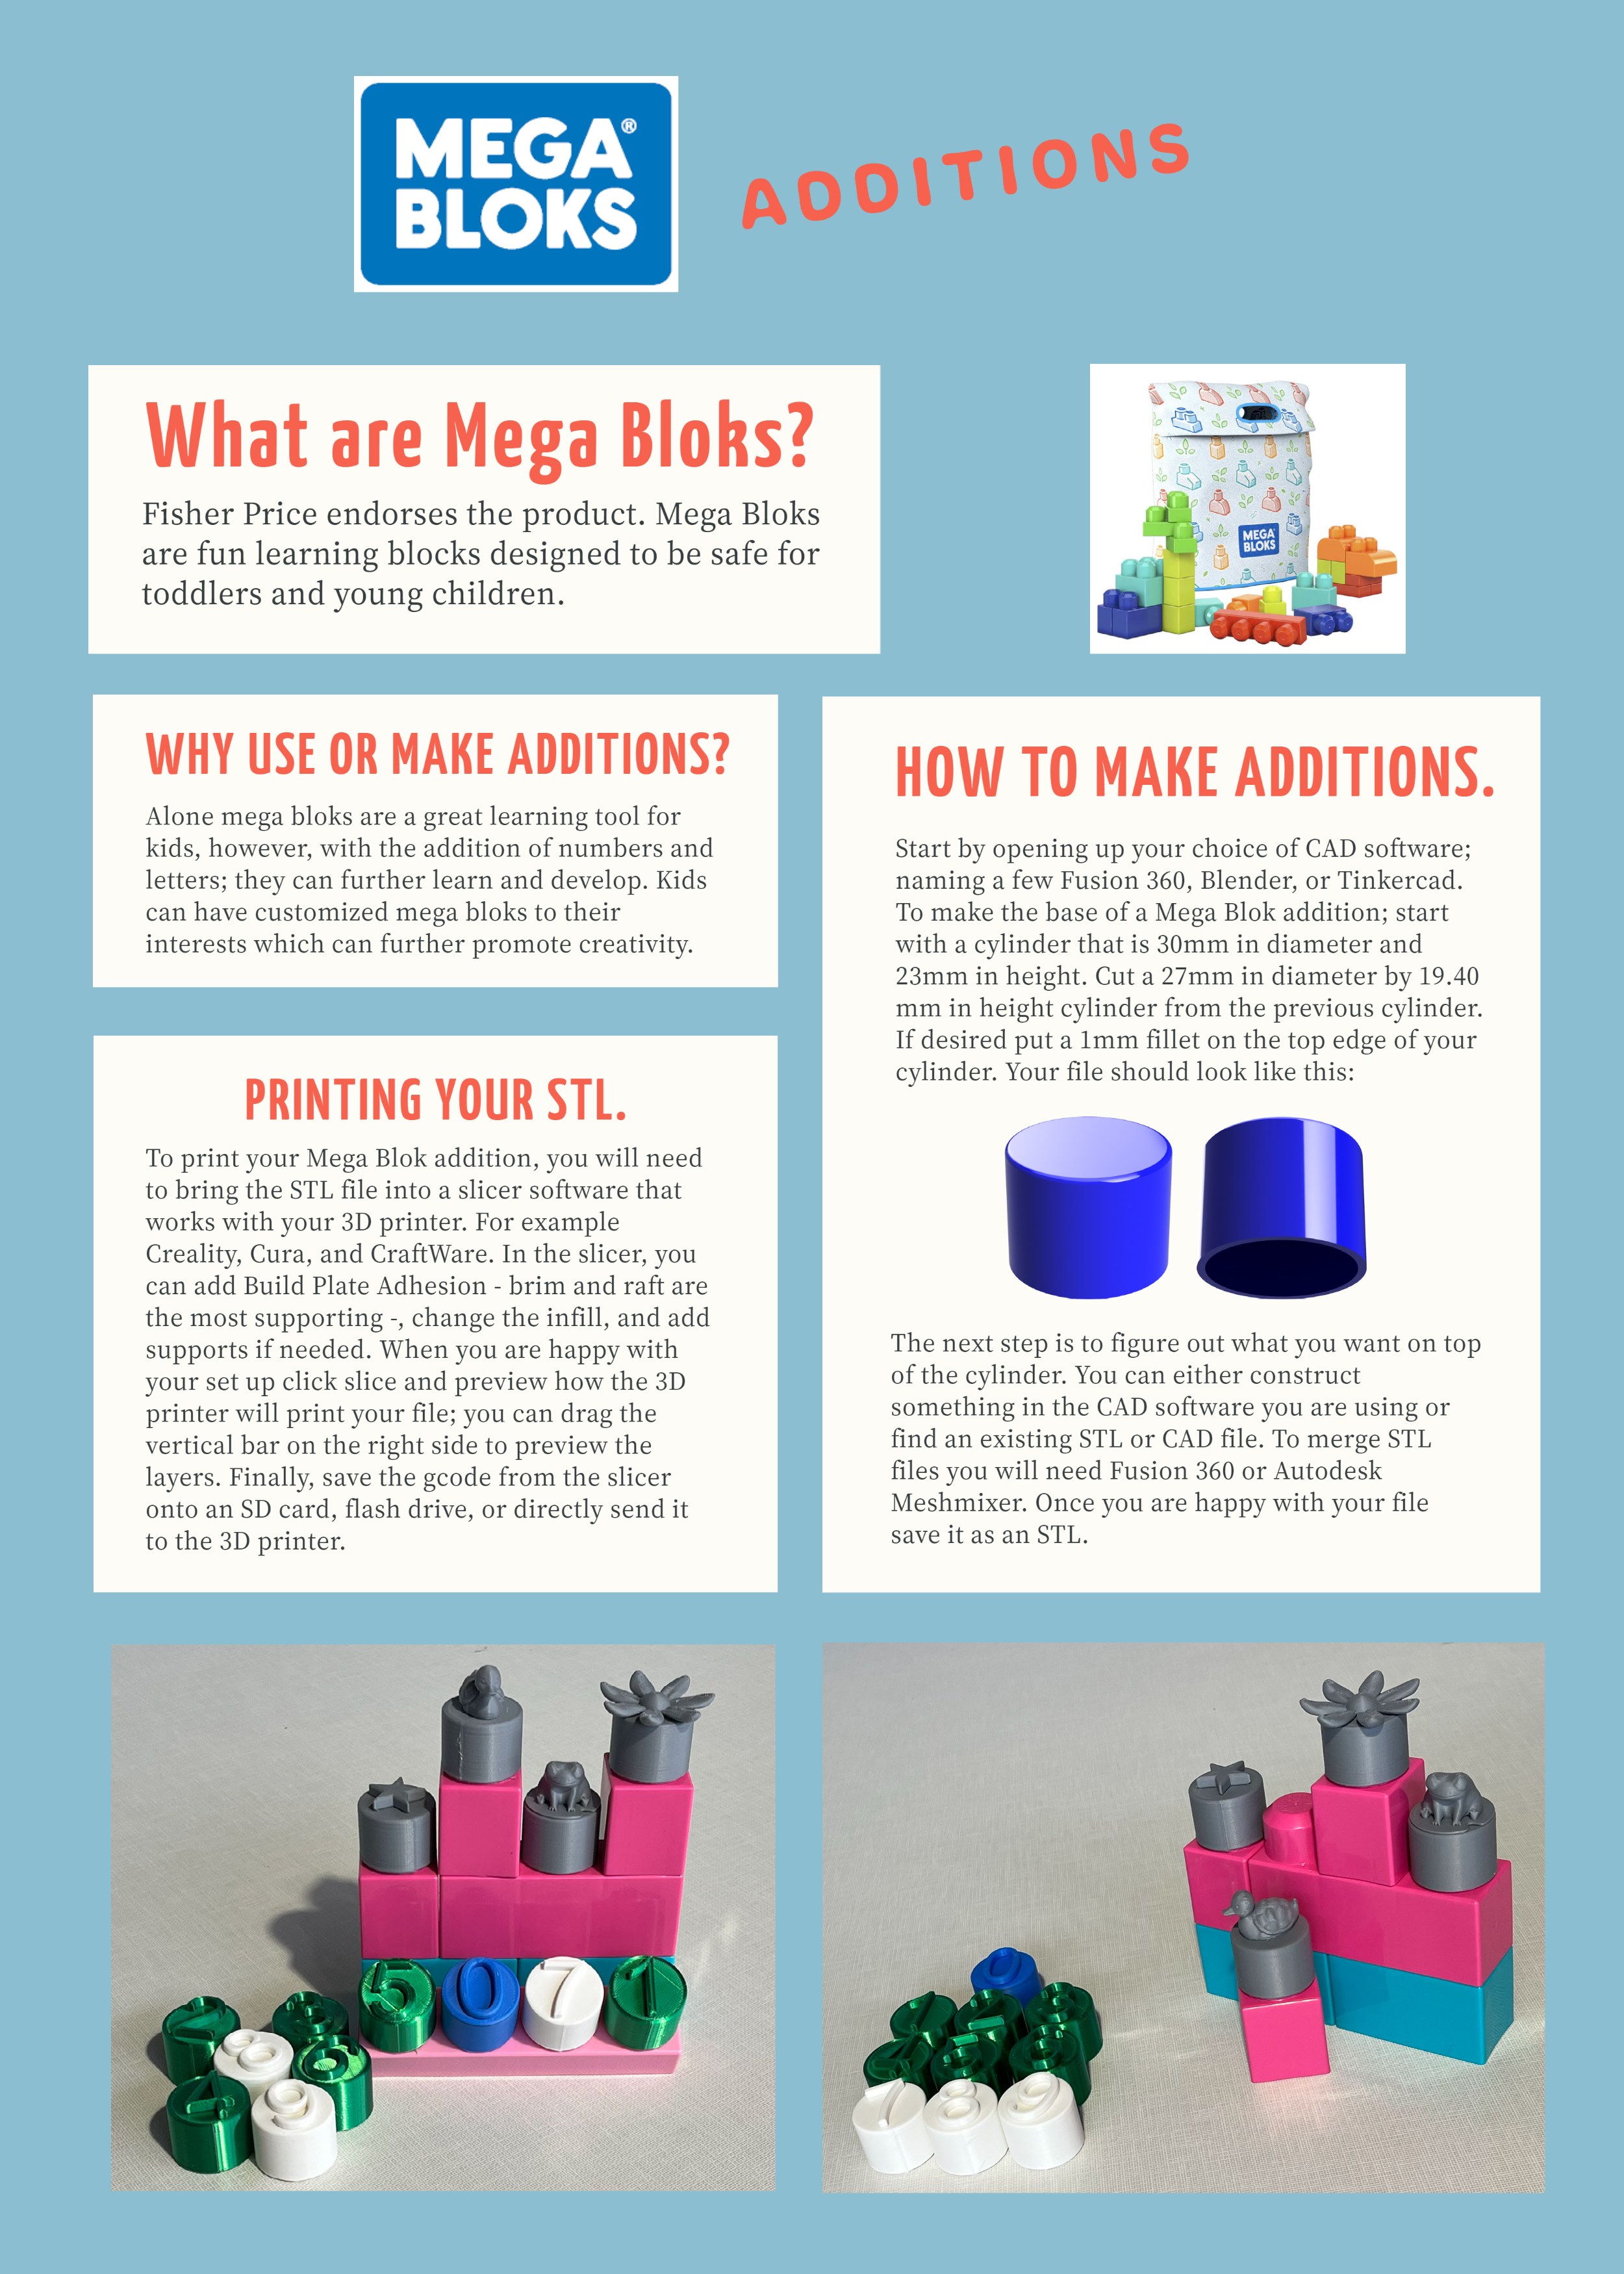
Start by opening up your choice of CAD software; naming a few Fusion 360, Blender, or Tinkercad. To make the base of a Mega Blok addition; start with a cylinder that is 30mm in diameter and 23mm in height. Cut a 27mm in diameter by 19.40 mm in height cylinder from the previous cylinder. If desired put a 1mm fillet on the top edge of your cylinder. Your file should look like this:

The next step is to figure out what you want on top of the cylinder. You can either construct something in the CAD software you areusing or find an existing STL or CAD file. To merge STL files you will need Fusion 360 or Autodesk Meshmixer. Once you are happy with your file save it as an STL.

Printing your STL.
To print your Mega Blok addition, you will need to bring the STL file into a slicer software that works with your 3D printer. For example Creality, Cura, and CraftWare. In the slicer, you can add Build Plate Adhesion - brim and raft are the most supporting -, change the infill, and add supports if needed. When you are happy with your set up click slice and preview how the 3D printer will print your file; you can drag the vertical bar on the right side to preview the layers. Finally, save the gcode from the slicer onto an SD card, flash drive, or directly send it to the 3D printer.

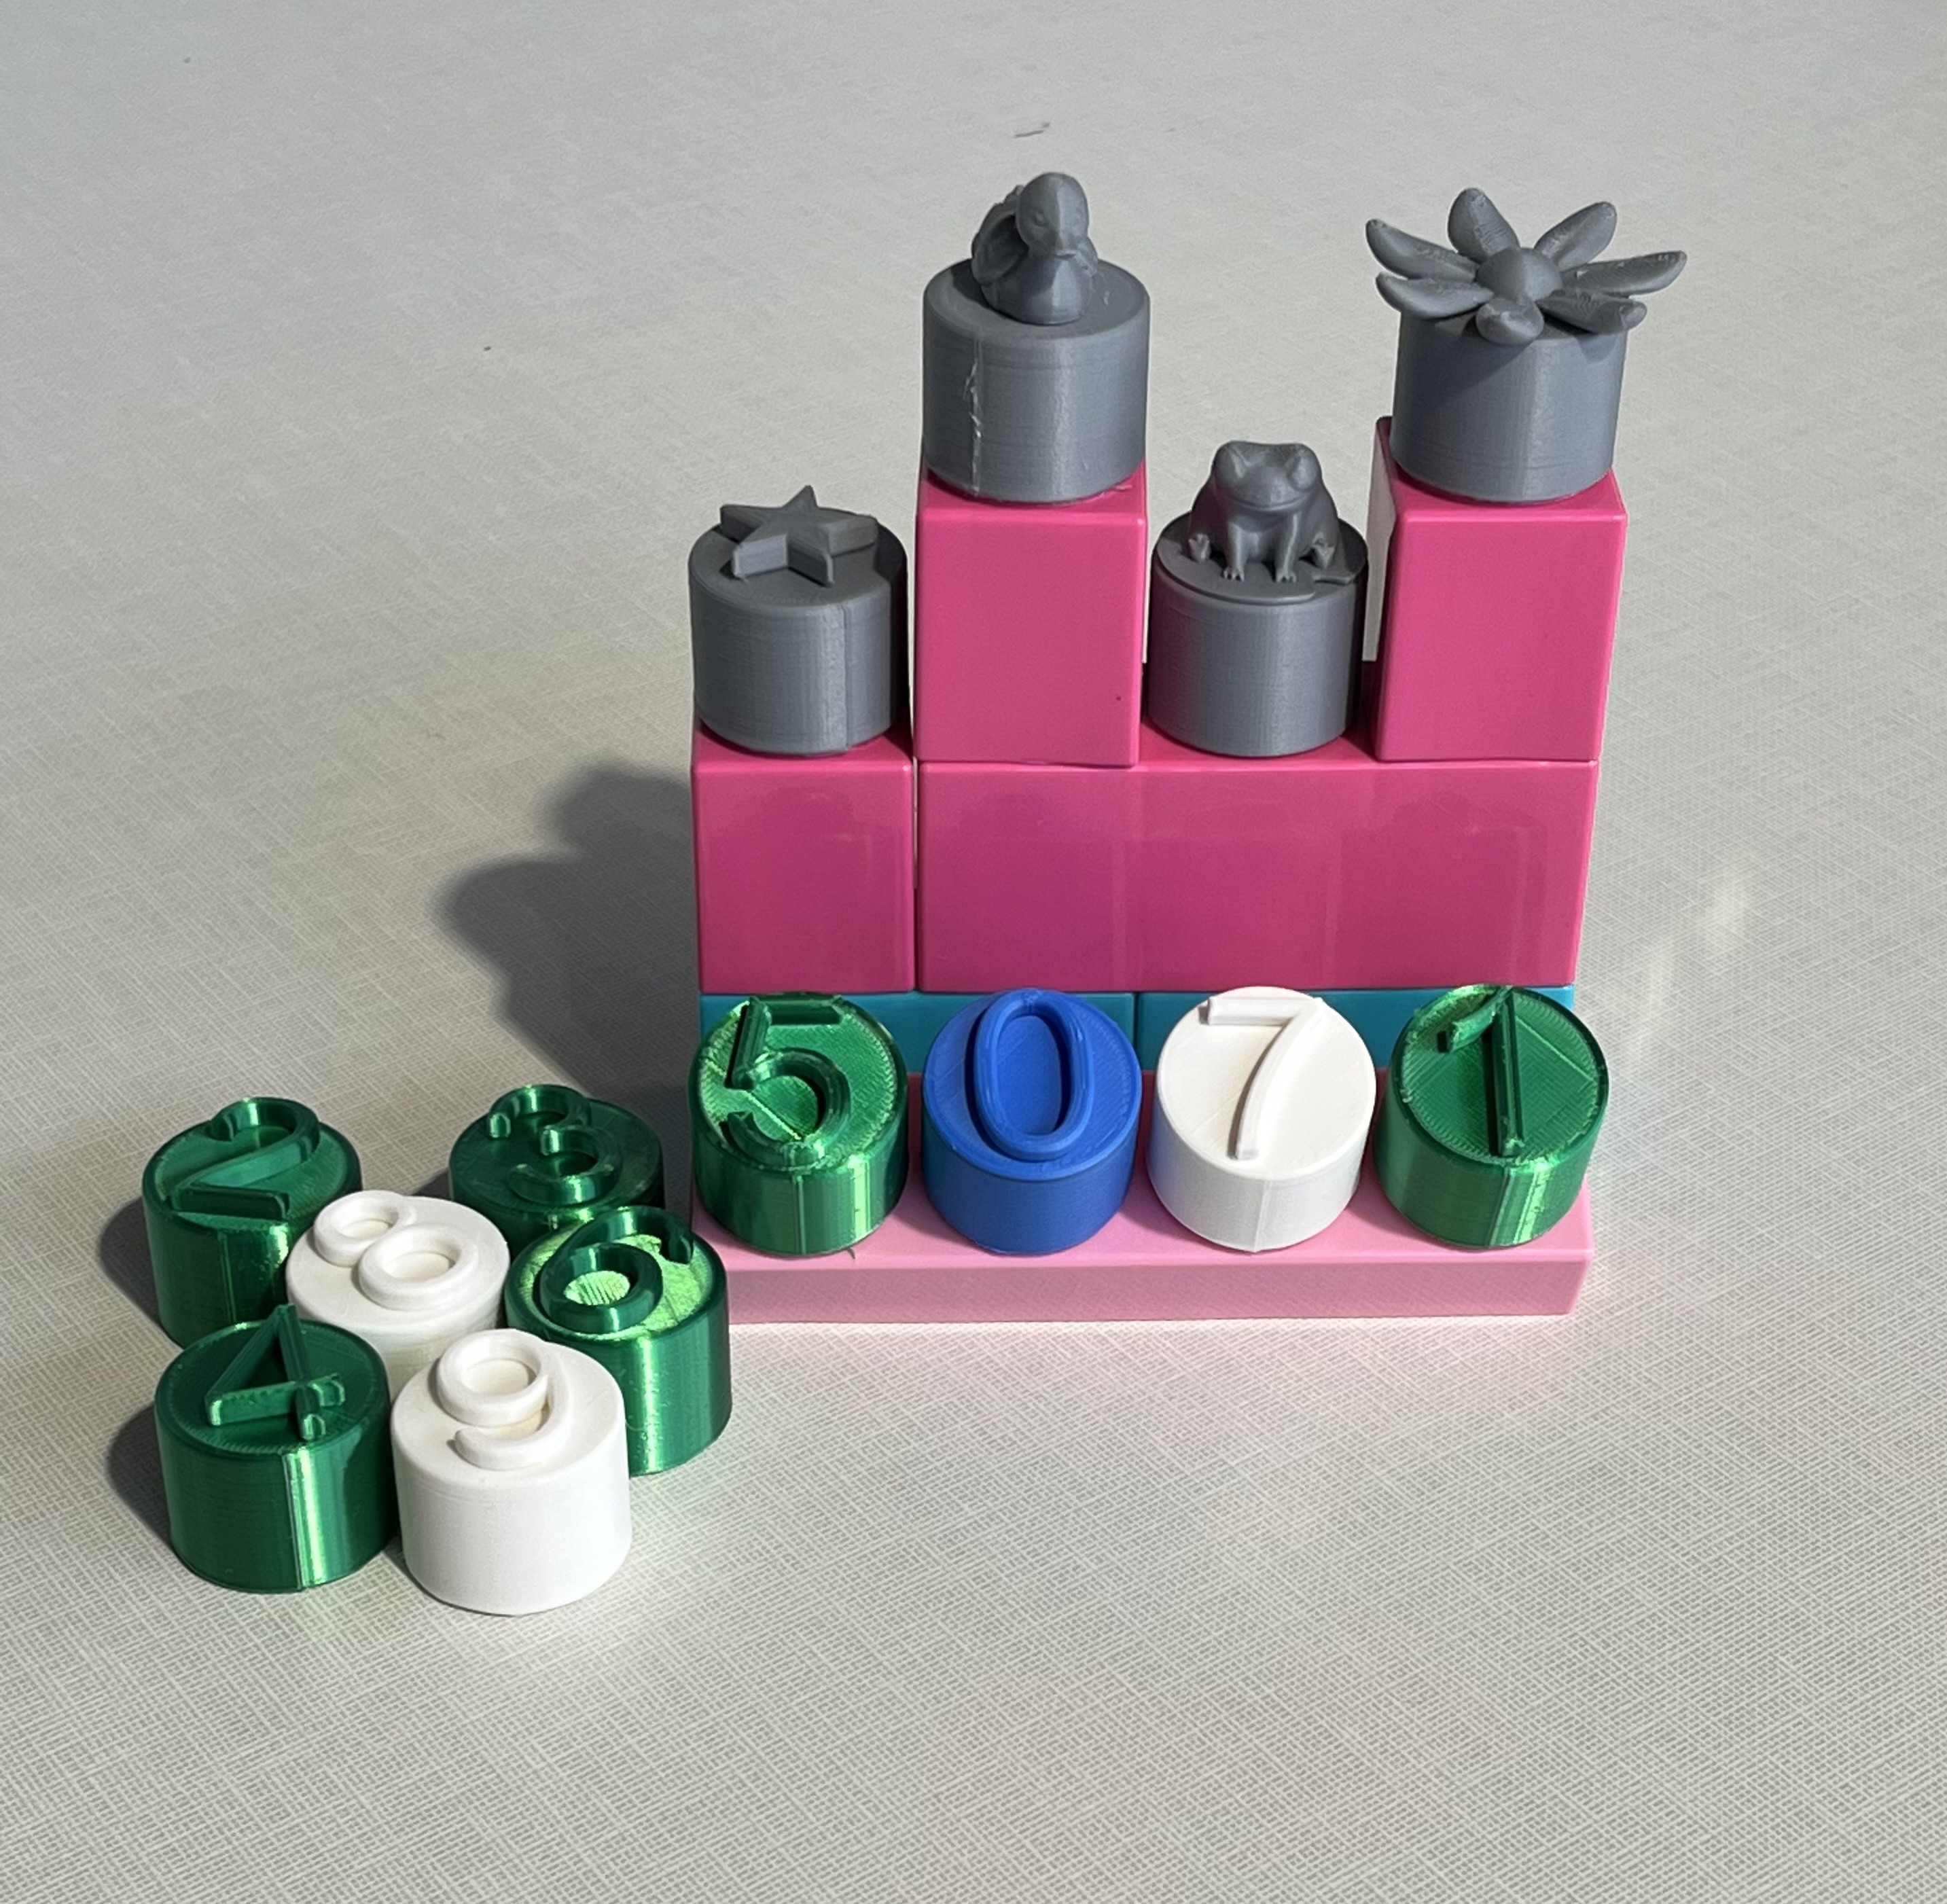
Project Examples
Have a solution to this challenge you want to share? Take a photo or video of your prototype, post it on social media, and don’t forget to tag us @fluxspace_io


